Understanding the Basics of Egg Incubation
Incubation is a key part of hatching chicken eggs, whether you rely on nature or technology. It involves keeping fertilized eggs under controlled conditions so that they can develop into healthy chicks. Knowing the basics of this process is essential for anyone wanting to hatch eggs successfully.
The Basics of Chicken Egg Incubation
Incubation of chicken eggs can be done in two main ways:
Natural Incubation: A broody hen sits on her eggs, providing the warmth and care they need. She naturally knows how to keep the eggs warm, turn them, and maintain the right humidity levels.
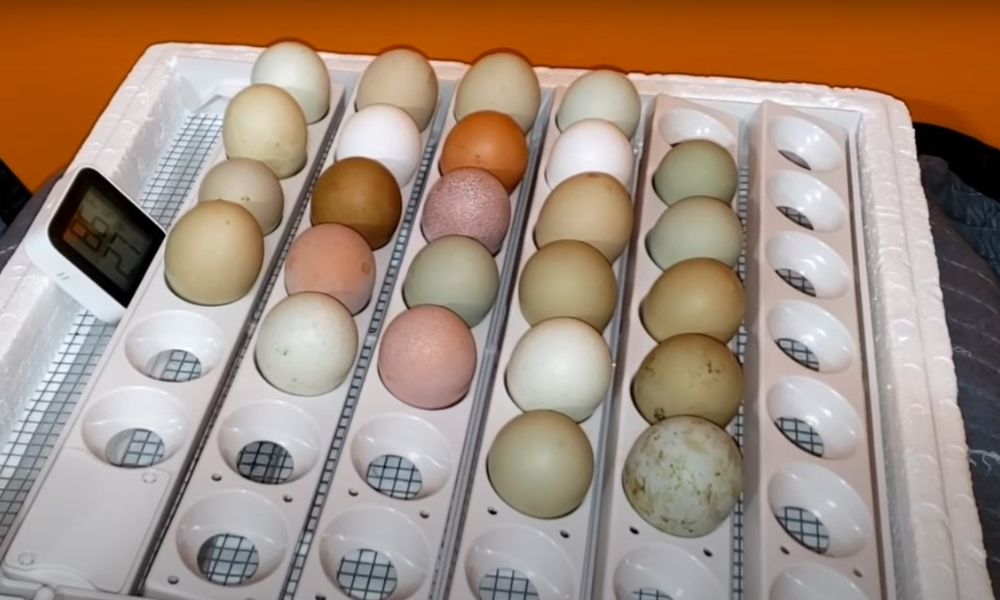
Artificial Incubation: When a broody hen isn’t available, an incubator can be used. An incubator is a machine that creates the same conditions as a hen would. It keeps the eggs at a steady temperature, controls humidity, and often turns the eggs automatically.
A Day-by-Day Development Process
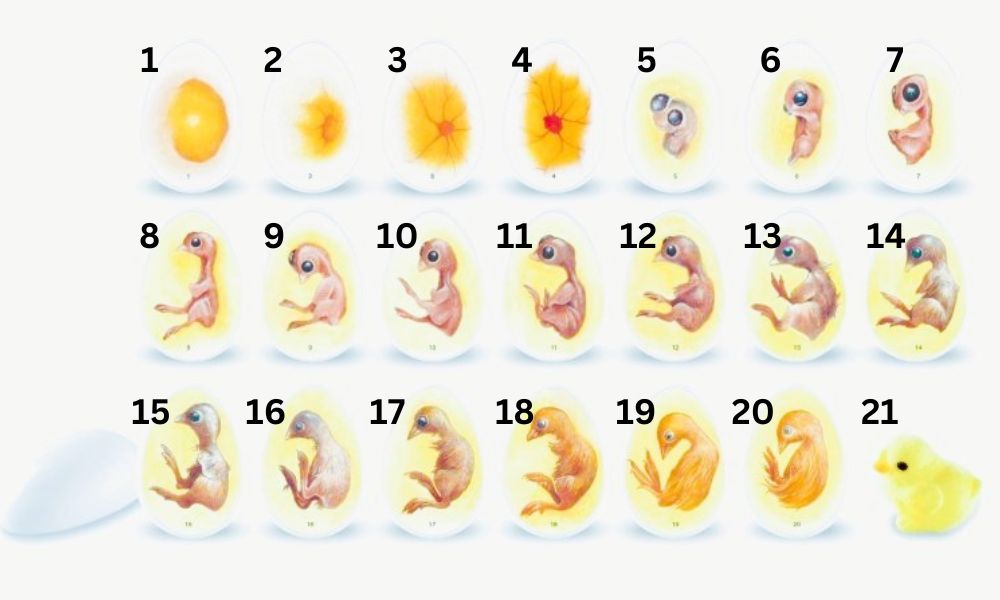
Chicken eggs usually take 21 days to hatch. During this time, the embryo inside the egg goes through important stages:
Days 1-6: The embryo begins to develop, with major organs starting to form by day 3.
Days 7-14: The chick’s features, like its beak and feathers, start to appear. By day 10, the embryo starts to look like a chick.
Days 15-20: The chick grows rapidly and fills the egg. The yolk sac, which feeds the chick, is absorbed into its body.
Day 21: The chick begins to hatch, using its egg tooth to break through the shell.
The Importance of Controlled Conditions
Keeping the right temperature, humidity, and ventilation during the 21 days of incubation is vital. Even small changes can affect the development of the embryo. This is why many people use incubators, as they allow for precise control over these conditions.
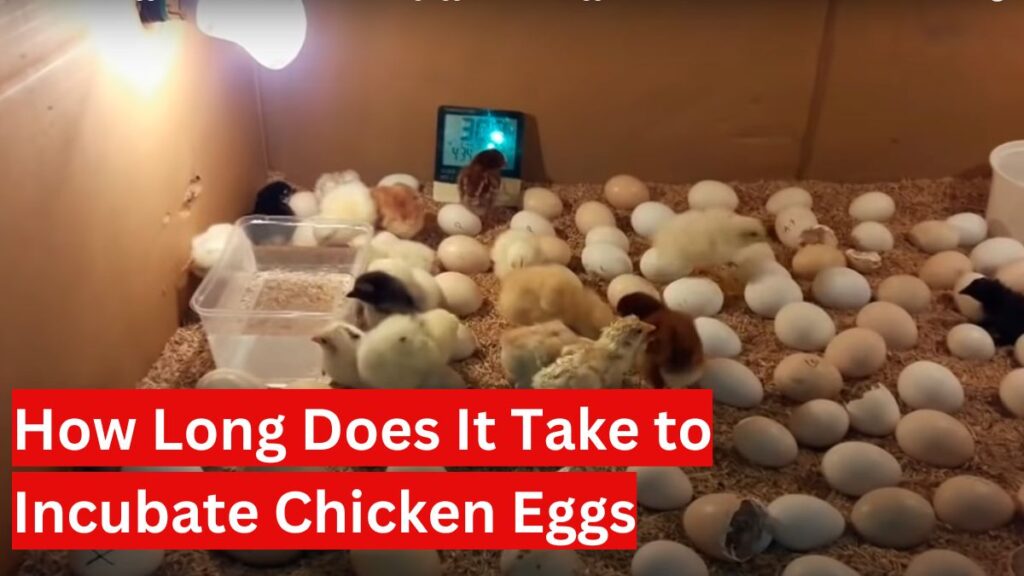
How Long Does It Take to Incubate Chicken Eggs?
The incubation period for eggs of chicken is typically around 21 days. This timeframe is generally consistent, but several factors can influence the exact duration. Here’s a detailed look at what affects the incubation period and how long you can expect it to take.
Factors That Can Affect Incubation Time
While 21 days is the norm, several factors can influence the exact hatching time:
Temperature: The temperature inside the incubator should be kept between 99.5°F and 100.5°F. Deviations from this range can cause the incubation period to be longer or shorter. For instance, lower temperatures may extend the incubation period, while higher temperatures can shorten it but may lead to developmental issues.
Humidity: Proper humidity is crucial. Ideally, humidity should be around 60-65% for the first 18 days and increased to 70% for the final 3 days. Inadequate or excessive humidity can affect the egg’s internal environment and potentially alter the hatching timeline.
Egg Size and Breed: Some breeds and larger eggs may have slightly longer incubation periods. While most eggs will hatch around day 21, larger eggs or specific breeds might take an extra day or two.
Manual vs. Automatic Incubator
When it comes to incubating chicken eggs, choosing between a manual and an automatic incubator can impact your hatching success. Both types have their advantages and disadvantages, depending on your needs and experience level.
Manual Incubators
Manual incubators require hands-on management during all the incubation period for eggs of chicken. Users must manually control and adjust the temperature, humidity, and turning of the eggs.
Advantages:
- Manual incubators are generally less expensive than automatic models.
- They are straightforward to use and can be a good option for small-scale operations or hobbyists.
Disadvantages:
Manual incubators require frequent monitoring and adjustments. Temperature and humidity levels must be checked and maintained regularly.
- Eggs need to be turned by hand, usually at least three times a day, to ensure even development. This can be time-consuming and may affect the consistency of turning.
Automatic Incubators
Automatic incubators are designed to handle most of the process of incubation of chicken eggs with minimal user intervention. They often feature built-in systems for temperature control, humidity regulation, and egg turning.
Advantages:
- Automatic incubators manage temperature, humidity, and egg turning with minimal effort, allowing users to focus on other tasks.
- They provide more consistent conditions, which can lead to better hatching rates and healthier chicks.
- Many models come with digital controls and alarms for monitoring, making them user-friendly and efficient.
Disadvantages:
- Automatic incubators are typically more expensive than manual ones.
- They can be more complex to set up and require occasional maintenance to ensure all systems are functioning correctly.
Solutions for Common Incubation Problems
Even with careful planning and setup, issues can arise during the incubation process. Here’s a guide to troubleshooting common problems and ensuring a successful hatch.
Temperature Fluctuations
Temperature deviations can affect the development of the embryos, leading to poor hatch rates or deformed chicks.
Solution:
- Check Thermostat: Ensure the incubator’s thermostat is working correctly. Regularly calibrate it if necessary.
- Use Multiple Thermometers: Place multiple thermometers in different areas of the incubator to monitor temperature consistency.
- Adjust Settings: If the temperature is too high or too low, adjust the settings on the incubator. Consider using a separate heater or cooler if needed to stabilize the temperature.
Humidity Problems
Incorrect humidity levels can lead to issues such as malpositioned chicks or difficulty hatching.
Solution:
- Monitor Humidity: Use a reliable hygrometer to keep track of humidity levels.
- Adjust Water Levels: If humidity is too low, add more water to the incubator. If too high, reduce the water levels or increase ventilation.
- Check for Leaks: Ensure there are no leaks in the incubator that could affect humidity levels.
Egg Turning Issues
Inconsistent or improper egg turning can result in poorly developed embryos or stuck chicks.
Solution:
- Use an Automatic Turner: If using an automatic egg turner, ensure it is functioning properly and turning the eggs evenly.
- Turn Eggs Manually: For manual incubators, turn the eggs at least three times a day. Mark the eggs with a pencil to track turning.
- Check for Sticking: Ensure the eggs are not sticking to the incubator or each other, which can interfere with turning.
Poor Hatch Rates
Low hatch rates can result from a variety of factors, including temperature, humidity, or egg quality.
Solution:
- Review Conditions: Double-check the temperature, humidity, and ventilation settings to ensure they are within the recommended ranges.
- Inspect Eggs: Check for cracks or dirt on the eggs before incubation. Use a candling device to monitor embryo development and remove any non-viable eggs.
- Evaluate Egg Handling: Handle eggs carefully to avoid damaging them. Store eggs in a cool, dry place before incubation.
Late Hatching
Eggs that hatch later than expected may indicate issues with incubation conditions during the incubation of chicken eggs or egg development.
Solution:
- Extend the Incubation Period: If eggs are still viable, consider extending the incubation period by a day or two, especially if conditions have been fluctuating.
- Check Development: Use a candling device to assess the development of late-hatching eggs. Remove any eggs that show no signs of life.
What to Expect During Hatching
The hatching process is an exciting and crucial part of incubating chicken eggs. Understanding what to expect during the incubation period for eggs of chicken can help you manage the process effectively and ensure a smooth transition for the chicks from their eggs to their new environment.
The Hatching Process
As the incubation period nears its end, you’ll start to observe the signs of hatching:
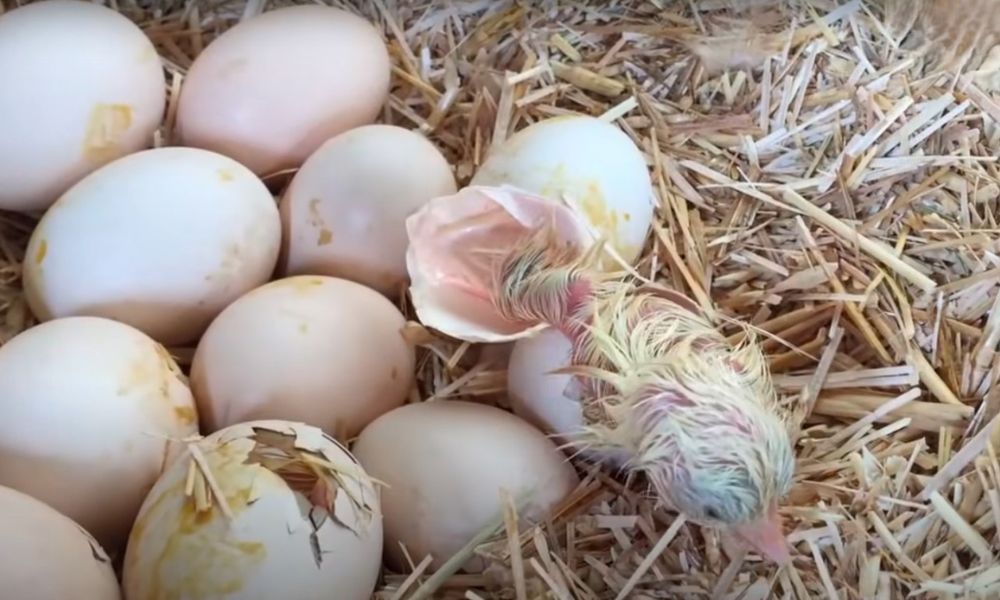
Pipping: This is the initial stage where the chick begins to break through the eggshell. The first sign of pipping is a small crack or hole in the shell, usually starting at the larger end of the egg.
Zipping: After the initial pip, the chick will begin to make a circular crack around the egg, known as zipping. This is done using a special structure on its beak called the egg tooth.
Emergence: Once the chick has zipped around the egg, it will begin to push its way out. This process can take several hours, and the chick will gradually work its way free from the shell. It’s important not to interfere during this process, as it requires time and effort from the chick to fully emerge.
Signs of a Successful Hatch
Active Movement: A successful hatch is indicated by the chick’s active movement and vocalizations as it emerges from the shell.
Full Emergence: The chick should fully exit the egg, usually within 24 hours of starting the pipping process.
Final Thoughts
Successfully incubating chicken eggs involves more than just placing them in an incubator. It requires careful attention to every step of the process. By understanding how temperature and humidity affect development, and by choosing the right incubator for your needs, you can greatly improve your chances of a successful hatch. Monitoring the eggs throughout the incubation period and knowing how to care for chicks once they have hatched are all critical parts of the process.
FAQs
1. What Happens If a Chick Hatches Too Early?
If a chick hatches too early, it may face several challenges:
Incomplete Development: Chicks that hatch too early may not be fully developed. This can lead to issues like weak legs, underdeveloped organs, or difficulty absorbing the yolk sac, which provides essential nutrients during the final days of incubation.
Lower Survival Chances: Early hatching can decrease the chick’s chances of survival, as it might not be strong enough to thrive outside the egg. These chicks may need extra care and a more controlled environment to increase their chances of survival.
Causes: Early hatching is often due to inconsistent temperature regulation. It’s important to regularly monitor and maintain the correct temperature in the incubator.
2. What Happens if Chicken Eggs Don’t Hatch in 21 Days?
If chicken eggs do not hatch by day 21, here’s what could be happening:
Delayed Development: Sometimes, chicks develop more slowly than expected. This change in incubation period for eggs of chicken is due to slightly lower incubation temperatures or variations in egg size and breed. In this case, hatching might occur a day or two late.
Egg Viability: Eggs that do not hatch by day 21 might not be viable, meaning the embryos didn’t develop properly or have stopped developing. This can happen due to improper incubation conditions, such as temperature or humidity fluctuations, or other factors like egg quality.
What to Do: If eggs have not hatched by day 21, it is important to continue monitoring the conditions in the incubator. You can candle the eggs (using a bright light to see inside) to check for signs of movement or life.